No-Bake Peanut Butter Twix Pie Recipe
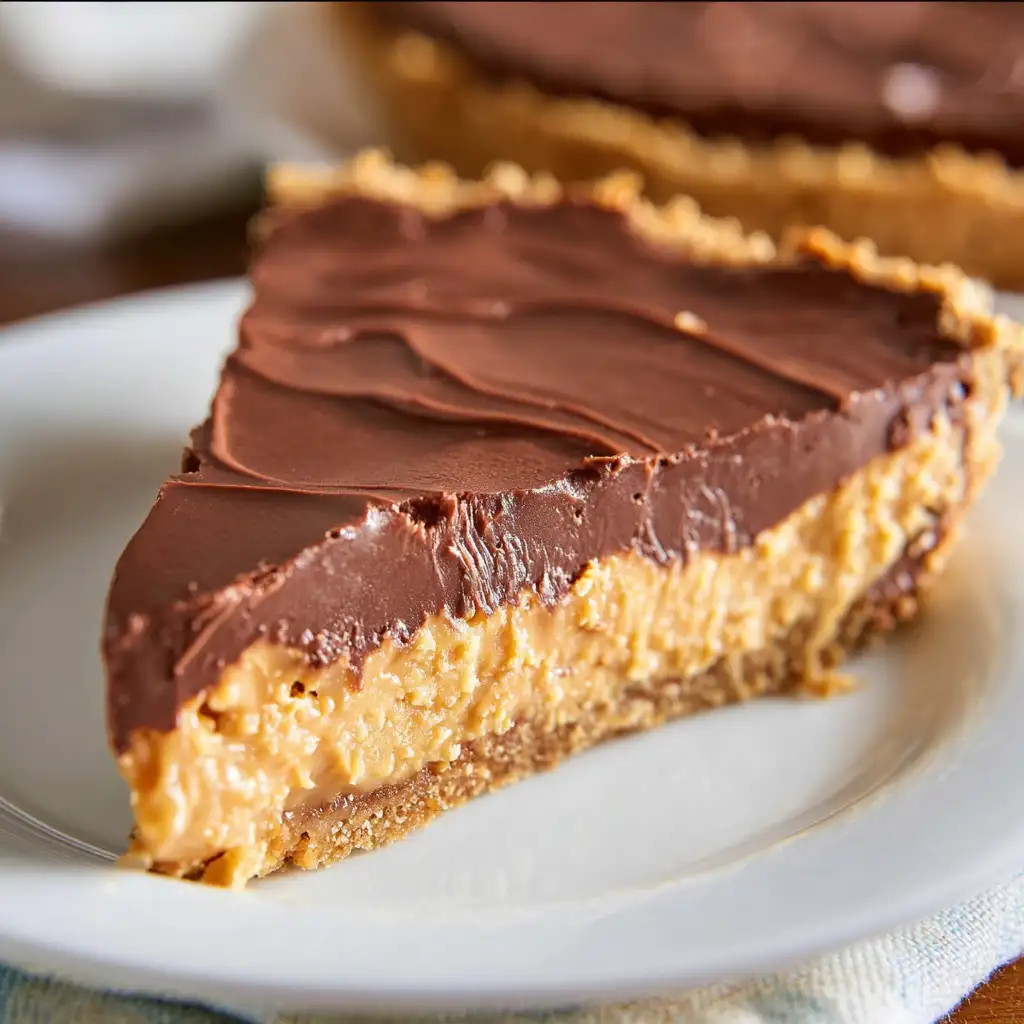
If you’re craving a rich, creamy dessert without turning on the oven, this No-Bake Peanut Butter Twix Pie is the perfect treat. Featuring a buttery shortbread cookie crust, a luscious peanut butter cheesecake filling, and a light chocolate topping, this irresistible dessert delivers the perfect combination of sweet, salty, creamy, and chocolatey flavors. Every slice melts in your mouth while offering just the right amount of crunch from the cookie crust.
Made with simple ingredients and requiring only a few easy steps, this easy dessert recipe is perfect for holidays, birthdays, potlucks, family dinners, or whenever you’re craving a homemade dessert. Best of all, it’s a no-fail recipe that’s ideal for beginners since the refrigerator does all the hard work.
Why Everyone Loves This No-Bake Peanut Butter Twix Pie
- No oven required, making it a perfect dessert for warm weather and busy days.
- Rich layers of peanut butter, chocolate, and buttery shortbread create an unforgettable flavor.
- Uses simple, affordable ingredients that are easy to find at any grocery store.
- A beginner-friendly recipe with easy-to-follow instructions.
- Perfect for holidays, birthdays, BBQs, potlucks, and family gatherings.
- Can be made a day ahead, making entertaining stress-free.
Ingredients Overview
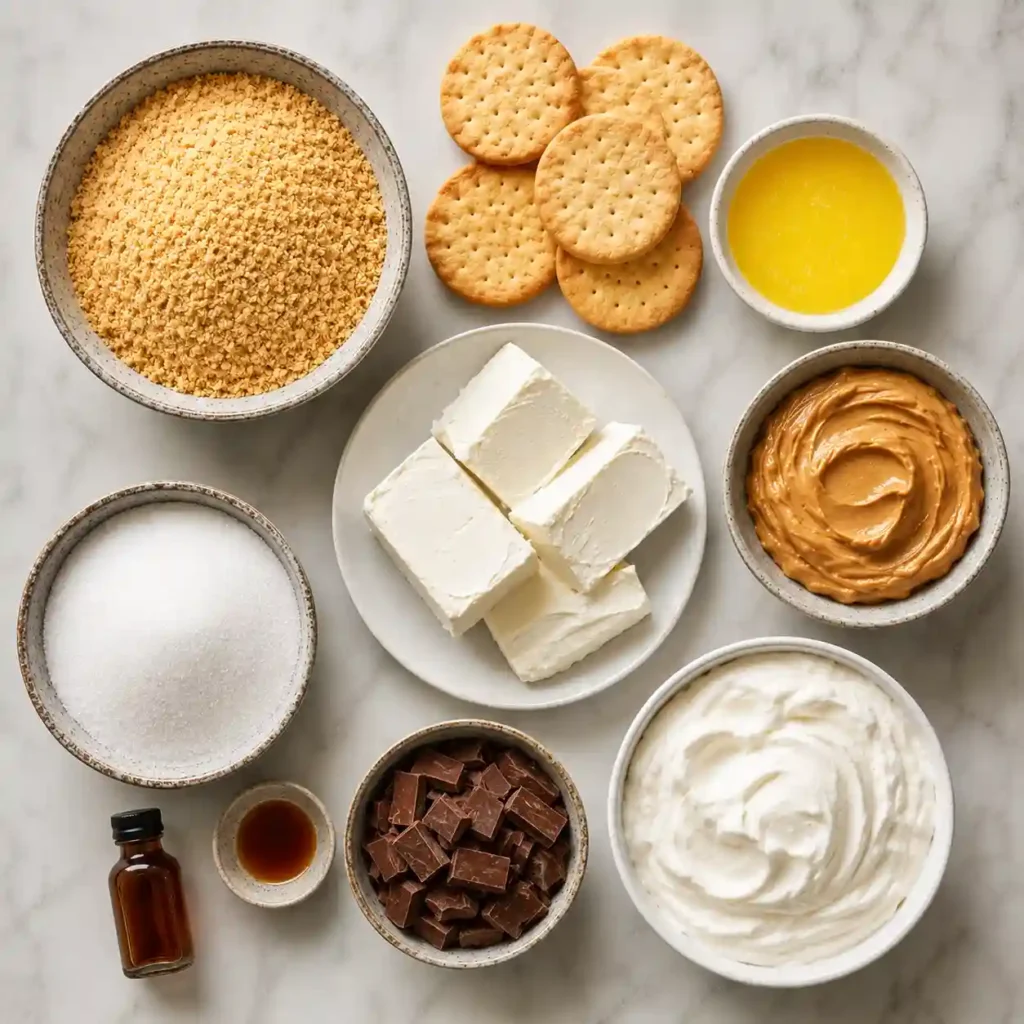
Shortbread Cookie Crumbs
These buttery cookie crumbs create a sturdy, flavorful crust that pairs beautifully with the creamy filling. Shortbread cookies offer a richer flavor than traditional graham crackers.
Melted Butter
Butter binds the cookie crumbs together and helps the crust firm up as it chills.
Cream Cheese
Softened cream cheese creates the smooth, creamy base while adding a subtle tang that balances the sweetness.
Peanut Butter
Creamy peanut butter delivers the signature nutty flavor and luxurious texture. Regular creamy peanut butter works best for the smoothest filling.
Granulated Sugar
Sweetens the filling while balancing the slight tanginess of the cream cheese.
Vanilla Extract
Enhances all the flavors and adds warmth to the dessert.
Semi-Sweet Chocolate
Creates the fluffy chocolate topping while preventing the pie from becoming overly sweet.
Cool Whip
Folded into both the filling and topping, Cool Whip gives this pie its light, airy, melt-in-your-mouth texture.
Variations
Add a Caramel Layer
Spread a thin layer of caramel sauce between the peanut butter filling and chocolate topping for an even more authentic Twix-inspired dessert.
Peanut Butter Cup Version
Fold chopped peanut butter cups into the filling for extra texture and flavor.
Chocolate Lover’s Pie
Mix mini chocolate chips into the peanut butter layer and garnish with chocolate curls.
Gluten-Free Option
Use gluten-free shortbread cookies to make this dessert gluten-friendly.
Crunchy Peanut Butter Twist
Replace creamy peanut butter with crunchy peanut butter for a satisfying crunch in every bite.
How to Make No-Bake Peanut Butter Twix Pie
Step 1: Prepare the Crust
Crush the shortbread cookies into fine crumbs using a food processor or by placing them in a sealed bag and crushing them with a rolling pin.
Mix the cookie crumbs with the melted butter until evenly coated.
Press the mixture firmly into the bottom and up the sides of a 9-inch pie plate.
Place the crust in the refrigerator while preparing the filling.
Step 2: Make the Peanut Butter Filling
Using a hand mixer, beat the softened cream cheese until completely smooth.
Add the peanut butter, granulated sugar, and vanilla extract.
Mix until the filling is creamy and well combined.
Gently fold in one container (8 ounces) of Cool Whip using a spatula until fully incorporated.
Spread the filling evenly over the chilled crust.
Step 3: Make the Chocolate Layer
Place the semi-sweet chocolate into a microwave-safe bowl.
Heat in 30-second intervals, stirring after each round until the chocolate is smooth and melted.
Allow it to cool slightly before gently folding in about one cup of the remaining Cool Whip.
Spread the chocolate mixture evenly over the peanut butter filling.
Step 4: Chill the Pie
Cover the pie with plastic wrap.
Refrigerate for at least 4 hours, although overnight chilling produces the best flavor and texture.
Step 5: Garnish and Serve
Slice the chilled pie with a sharp knife.
Top with additional Cool Whip, chopped peanuts, chocolate curls, or a drizzle of caramel sauce before serving if desired.
Pro Tips & Cooking Secrets
- Always soften the cream cheese completely before mixing to achieve a silky-smooth filling.
- Chill the crust before adding the filling to help it stay firm when slicing.
- Let the melted chocolate cool slightly before mixing with Cool Whip so it stays light and fluffy.
- For clean slices, dip a sharp knife in hot water and wipe it dry between each cut.
Serving Suggestions
- Serve with freshly whipped cream and chocolate shavings.
- Drizzle warm caramel sauce over each slice for extra decadence.
- Pair with hot coffee, espresso, or a cold glass of milk.
- Garnish with chopped peanuts or crushed Twix candy bars for added crunch.
How to Store No-Bake Peanut Butter Twix Pie
Refrigerator
Cover the pie tightly with plastic wrap or store it in an airtight container. It will stay fresh in the refrigerator for up to 5 days.
Freezer
Wrap the pie tightly with plastic wrap followed by aluminum foil. Freeze for up to 2 months.
Thawing
Transfer the frozen pie to the refrigerator and allow it to thaw overnight before serving.
Make Ahead
This is the perfect make-ahead dessert because the flavors improve after chilling overnight.
No-Bake Peanut Butter Twix Pie FAQs
Can I make No-Bake Peanut Butter Twix Pie ahead of time?
Yes! This pie is actually even better after chilling overnight, making it an ideal make-ahead dessert for parties and holidays.
Can I use homemade whipped cream instead of Cool Whip?
Absolutely. Stabilized homemade whipped cream works well, although Cool Whip provides a firmer texture and longer-lasting stability.
What type of peanut butter works best?
Regular creamy peanut butter such as Skippy or Jif produces the smoothest filling. Natural peanut butter may create a softer consistency.
Can I freeze No-Bake Peanut Butter Twix Pie?
Yes. Wrap it tightly and freeze for up to two months. Thaw overnight in the refrigerator before serving.
Can I make this pie taste even more like a Twix bar?
Definitely! Add a thin layer of caramel sauce between the peanut butter filling and chocolate topping, then garnish with chopped Twix bars for extra flavor and texture.

No-Bake Peanut Butter Twix Pie

Equipment
- 9-inch pie plate
- mixing bowl
- Hand mixer
- fork
- microwave-safe bowl
- rubber spatula
Ingredients
- 2 cups shortbread cookie crumbs (about 30 Lorna Doone cookies)
- 6 tbsp butter, melted
- 8 oz cream cheese, room temperature
- 1 cup peanut butter
- 1/2 cup granulated sugar
- 1 tsp vanilla extract
- 2 oz semi-sweet chocolate
- 12 oz Cool Whip (1½ containers)
Instructions
- Stir the cookie crumbs and melted butter together with a fork. Press the mixture into a 9-inch pie plate and chill until ready to fill.
- Beat the cream cheese until smooth with a hand mixer. Mix in the peanut butter, sugar, and vanilla extract. Fold in 8 ounces of Cool Whip until combined, leaving a few small lumps if needed. Spread the filling into the prepared crust.
- Melt the semi-sweet chocolate in a microwave-safe bowl using 30-second intervals, stirring between each until smooth. Stir in about 1 cup of the remaining Cool Whip and spread over the pie.
- Chill the pie overnight, or at least 4 hours, before serving. Garnish with additional Cool Whip if desired.