Easy Peanut Butter Fudge
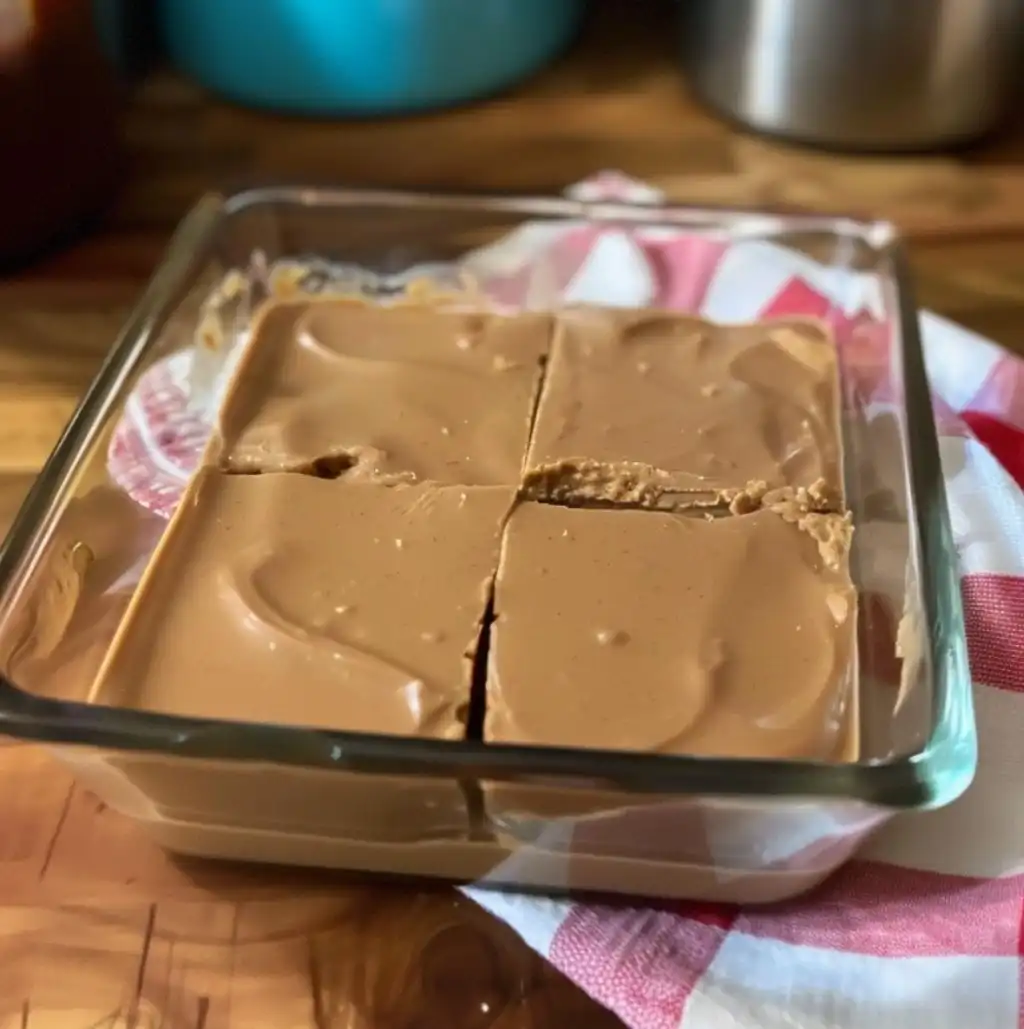
If you love old-fashioned homemade sweets, this Easy Peanut Butter Fudge is a simple treat you will want to make again and again. Made with just four ingredients—sugar, milk, peanut butter, and vanilla extract—this classic fudge comes together in one pot without complicated techniques or special equipment.
The result is a rich, sweet peanut butter treat with a smooth texture and a delicious homemade flavor. Unlike recipes that require chocolate chips, marshmallow creme, or condensed milk, this version relies on a simple stovetop method to create its signature fudge consistency.
This recipe is perfect for holiday dessert trays, family gatherings, homemade gifts, or a little something sweet to enjoy with an afternoon cup of coffee. You only need a few minutes of cooking time before pouring the mixture into a prepared dish and letting it cool.
If you enjoy easy recipes made with pantry staples, this Easy Peanut Butter Fudge is a wonderful addition to your collection of classic homemade desserts.
Why Everyone Loves This Easy Peanut Butter Fudge
Only Four Simple Ingredients
You don’t need a long shopping list to make delicious fudge. Sugar, milk, peanut butter, and vanilla extract provide everything needed for this straightforward recipe.
Quick and Simple Preparation
The cooking process is easy to follow. Boil the sugar and milk, stir in the peanut butter and vanilla, and transfer the mixture to a prepared dish. Once cooled, the fudge is ready to slice and serve.
Rich Peanut Butter Flavor
Peanut butter gives this fudge its familiar nutty taste and creamy richness. Vanilla extract rounds out the flavor, making each bite sweet and satisfying.
Perfect for Sharing
Cut the fudge into small squares for dessert platters, bake sales, parties, or homemade food gifts. Its bite-sized portions make it easy to share with family and friends.
A Classic Homemade Treat
There’s something special about old-fashioned fudge made from scratch. This recipe offers a simple way to recreate that traditional homemade candy experience without relying on complicated ingredients.
Ingredients Overview
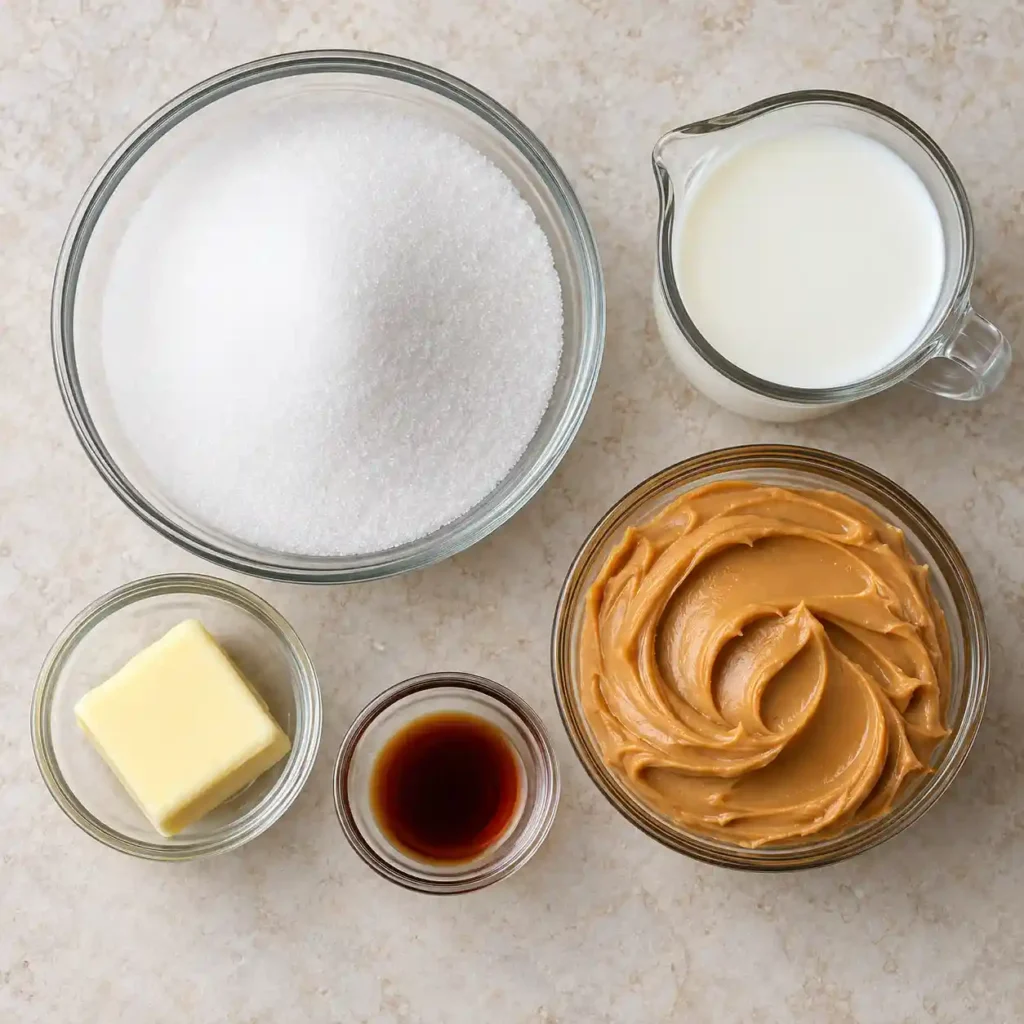
You need only four ingredients to prepare this homemade peanut butter fudge. Since the ingredient list is short, measuring carefully helps produce the best results.
Sugar
Two cups of sugar provide the sweetness and help the fudge set as it cools. Sugar also plays an important role in the final texture, so avoid changing the amount without adjusting the recipe method.
Milk
Half a cup of milk combines with the sugar to create the syrup that forms the fudge base. The recipe does not specify a particular milk fat percentage, so regular dairy milk is a straightforward choice.
Peanut Butter
Three-quarters of a cup of peanut butter provides the main flavor and creamy richness. Conventional creamy peanut butter is a good option for a smooth, uniform texture. Natural peanut butter that separates easily may produce less predictable results.
Vanilla Extract
One teaspoon of vanilla extract adds warmth and enhances the peanut butter flavor. Stir it in after removing the pot from the heat to preserve its aroma.
Equipment You’ll Need
- A medium-sized saucepan or pot
- A wooden spoon or heat-resistant spatula
- An 8 × 8-inch baking dish
- Butter for greasing the dish
- A knife for slicing the cooled fudge
Having everything prepared before you begin makes this quick recipe easier to manage, especially because the mixture starts to thicken as it cools.
Variations
This traditional recipe is delicious as written, but you can try a few optional variations if you want to change the flavor or presentation.
Chocolate Peanut Butter Fudge
For a chocolate-inspired version, drizzle melted chocolate over the cooled fudge and allow it to set before slicing. This adds a chocolate finish without changing the original fudge mixture.
Crunchy Peanut Butter Fudge
Use crunchy peanut butter instead of creamy peanut butter for extra texture. The finished fudge will have small peanut pieces throughout.
Peanut Butter and Chocolate Swirl
Spread the fudge mixture into the prepared dish, then add a small amount of melted chocolate on top. Gently swirl it through the surface with a toothpick before the mixture sets.
Sea Salt Topping
For a sweet-and-salty contrast, sprinkle a very small amount of flaky sea salt over the surface while the fudge is still soft.
Festive Fudge Squares
Cut the cooled fudge into small squares and arrange them in paper candy cups. This simple presentation works well for holiday dessert trays and homemade gifts.
Keep in mind that additions such as chocolate, nuts, or toppings are optional and are not part of the original four-ingredient recipe.
How to Make Easy Peanut Butter Fudge
Follow these simple steps to prepare a batch of homemade peanut butter fudge.
Step 1: Prepare the Baking Dish
Lightly butter an 8 × 8-inch baking dish, covering the bottom and sides. Set it aside so it is ready when the hot fudge mixture is finished.
For easier removal, you can optionally line the dish with parchment paper before greasing it lightly.
Step 2: Combine the Sugar and Milk
Add the sugar and milk to a medium-sized pot. Stir to combine, then place the pot over medium heat.
Continue stirring as the mixture heats to help the sugar dissolve. Once it reaches a boil, prepare to time the cooking stage carefully.
Step 3: Boil for 2½ Minutes
Allow the sugar and milk mixture to boil for 2½ minutes, following the recipe’s specified timing.
Keep a close eye on the pot to prevent the mixture from boiling over. Maintain a steady boil rather than turning the heat up too high.
The sugar syrup is important to the final texture of the fudge. Because stovetop temperatures and pot sizes can vary, the mixture may behave slightly differently from one kitchen to another.
Step 4: Add the Peanut Butter and Vanilla
Remove the pot from the heat. Immediately add the peanut butter and vanilla extract.
Stir thoroughly until the peanut butter melts into the hot syrup and the mixture becomes smooth and evenly combined. Work steadily because the fudge can begin thickening as it cools.
Avoid continuing to cook the mixture after adding the peanut butter unless necessary to combine it.
Step 5: Transfer the Mixture to the Dish
Carefully pour the hot mixture into the buttered 8 × 8-inch baking dish.
Use a heat-resistant spatula to guide the mixture into the corners and spread the surface evenly. The mixture will be hot, so handle the pot carefully.
If you want a neat appearance, smooth the top before the fudge begins to set.
Step 6: Let the Fudge Cool Completely
Leave the dish undisturbed until the fudge has cooled completely and become firm enough to slice.
The cooling time can vary depending on the temperature of your kitchen and the thickness of the mixture. Avoid cutting it too early, as warm fudge may be soft and difficult to portion cleanly.
If necessary, refrigerate the dish after it has cooled down to help the fudge firm up.
Step 7: Slice and Serve
Once the fudge is fully set, cut it into small squares with a sharp knife.
For cleaner edges, wipe the knife between cuts. Arrange the pieces on a serving plate and enjoy.
The fudge is rich and sweet, so small squares are often the perfect serving size.
Pro Tips and Cooking Secrets
Measure the Ingredients Carefully
The balance between sugar, milk, and peanut butter helps determine how the fudge sets. Use the listed amounts rather than estimating them.
Prepare the Dish Before Cooking
Grease the baking dish before starting the stovetop steps. The mixture can thicken quickly after the peanut butter is added, so you don’t want to be preparing the dish at the last minute.
Watch the Boiling Time
The recipe calls for boiling the sugar and milk for 2½ minutes. Use a timer and keep the mixture at a steady boil. Large differences in cooking time can affect the final texture.
Stir Until Smooth
After adding the peanut butter and vanilla, stir until no obvious streaks remain. An evenly mixed base helps create consistent fudge throughout the dish.
Work Quickly After Removing the Pot From the Heat
Fudge can thicken as it cools. Have the prepared dish nearby and transfer the mixture promptly once it becomes smooth.
Allow Enough Cooling Time
Patience is important for this recipe. Let the fudge cool completely before slicing so the pieces hold their shape.
Use a Sharp Knife
A sharp knife creates cleaner squares than a dull one. If the fudge is firm, gently warm the knife under hot water, dry it completely, and then cut.
Keep Food Allergies in Mind
Peanut butter contains peanuts, a common food allergen. If serving this fudge at a gathering, label it clearly and keep it separate from foods intended for people with peanut allergies.
Serving Suggestions
Easy peanut butter fudge is a versatile sweet that works for casual treats and special occasions.
- With coffee or tea: Serve a small square alongside a warm drink for an afternoon treat.
- On a dessert platter: Arrange the fudge with cookies, brownies, and other small sweets.
- For holiday gatherings: Add the squares to a festive dessert tray or candy assortment.
- As a homemade gift: Place completely cooled pieces in a food-safe gift box or tin, using parchment paper to separate layers.
- As an after-dinner treat: Offer a small square after a family meal when you want something sweet without serving a large dessert.
Because the fudge is rich, cutting it into small pieces makes it easier for guests to enjoy a little without taking a large portion.
How to Store Easy Peanut Butter Fudge
At Room Temperature
Store the completely cooled fudge in an airtight container in a cool, dry place, away from direct sunlight and heat. For the best texture and quality, follow the storage guidance for the milk and peanut butter used, and refrigerate it if your kitchen is warm.
In the Refrigerator
For a firmer texture or longer storage, place the fudge in an airtight container and refrigerate it. Separate layers with parchment paper to prevent the pieces from sticking together.
Allow a piece to sit at room temperature briefly before serving if you prefer a softer bite.
In the Freezer
You can freeze the fudge in a freezer-safe airtight container. Separate the layers with parchment paper and label the container with the date.
Thaw the pieces in the refrigerator before serving. Keeping them covered while thawing helps limit condensation on the surface.
FAQs
Why didn’t my peanut butter fudge set?
The fudge may not have reached the right consistency during cooking, or the sugar syrup may have been affected by differences in cooking temperature. Measure the ingredients carefully and follow the 2½-minute boiling time. Allow the mixture to cool completely before deciding whether it has set.
Can I use crunchy peanut butter?
Yes. Crunchy peanut butter can be used instead of creamy peanut butter. The fudge will have a slightly more textured finish because of the peanut pieces.
Do I need a candy thermometer?
This recipe uses a timed boiling method and does not require a candy thermometer. However, stovetops and cookware vary, so the texture may be less predictable than with a temperature-controlled candy-making method.
How long does peanut butter fudge take to cool?
Cooling time varies with room temperature and the thickness of the fudge. Allow it to cool completely before slicing. If it remains soft after cooling, refrigerating it may help it firm up.
Can I make this fudge without vanilla extract?
Yes. Vanilla extract enhances the flavor, but you can leave it out if needed. The fudge will still have its characteristic peanut butter taste.
Can I double this recipe?
You can try doubling the ingredients, but a larger batch may heat and cool differently. Use a larger pot and a suitably sized dish, and pay close attention to the mixture’s consistency. The original 8 × 8-inch dish is intended for the recipe as written.
How should I cut fudge without crumbling it?
Wait until the fudge has cooled completely. Use a sharp knife, make firm cuts, and wipe the blade between slices. If the fudge is too soft, chill it briefly before cutting.
Can I give peanut butter fudge as a homemade gift?
Absolutely. Once the fudge is completely set, cut it into neat squares and place them in a clean, food-safe container. Include a label listing the ingredients, especially peanuts, so recipients know what the treat contains.
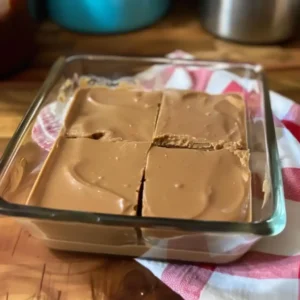
Easy Peanut Butter Fudge

Ingredients
- 2 cups sugar
- ½ cup milk
- ¾ cup peanut butter
- 1 tsp vanilla extract
Instructions
- In a pot, combine sugar and milk. Bring to a boil over medium heat.
- Let it boil for 2 1/2 minutes.
- Remove from heat, then stir in peanut butter and vanilla until smooth.
- Pour into a buttered 8×8-inch dish.
- Let it cool completely, then slice and enjoy!