No-Bake Oreo Vanilla Pudding Cake
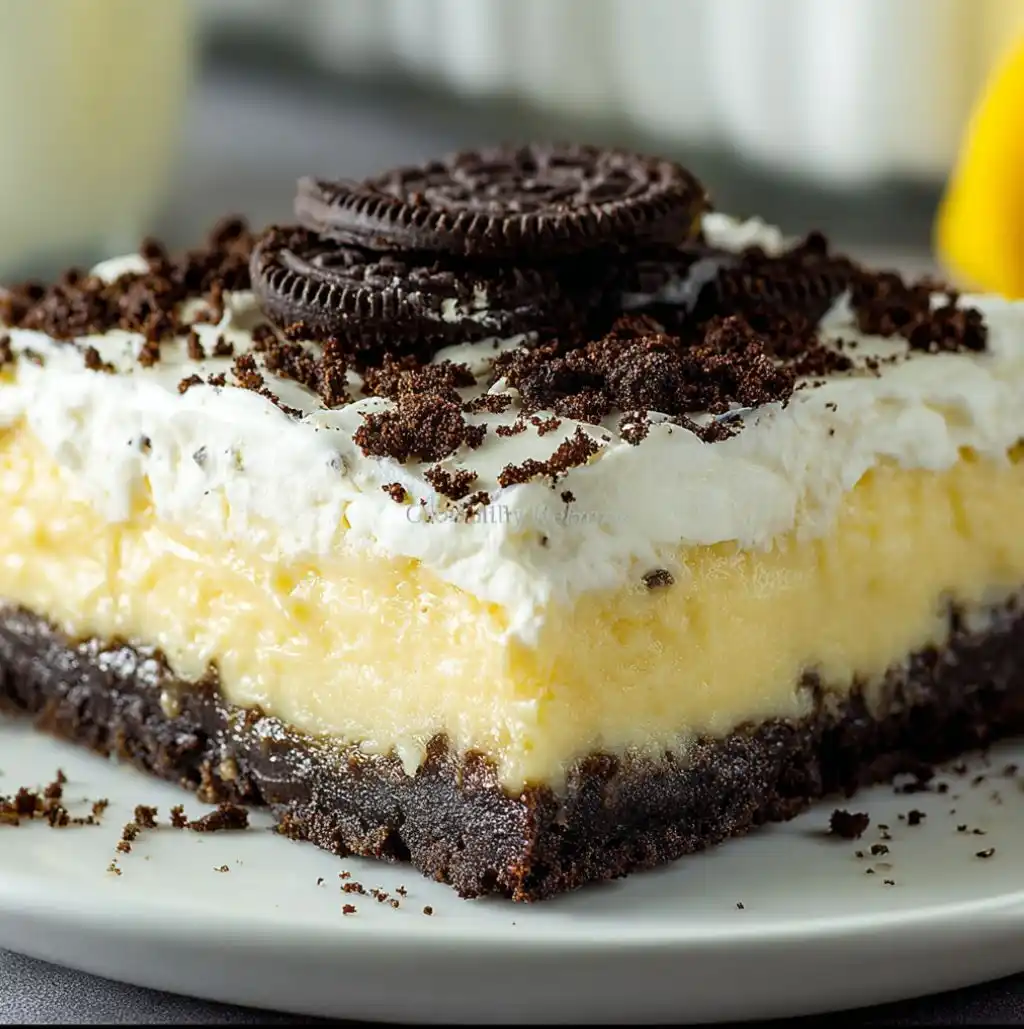
This No-Bake Oreo Vanilla Pudding Cake is a creamy, dreamy dessert that comes together in just 20 minutes without turning on the oven. With a buttery Oreo cookie crust, smooth vanilla pudding cream cheese filling, and fluffy Cool Whip topping, every bite is rich, creamy, and completely irresistible.
If you’re looking for an easy no-bake dessert recipe that requires only a handful of ingredients, this Oreo vanilla pudding cake is an excellent choice. There is no complicated baking process, no special equipment, and no need to spend hours in the kitchen. Simply prepare the crust, mix the creamy vanilla filling, add the whipped topping, and let the refrigerator do the rest.
The combination of crunchy chocolate Oreo cookies and sweet, creamy vanilla pudding makes this dessert especially delicious. The cream cheese adds a subtle tanginess that balances the sweetness and gives the filling a rich cheesecake-like texture.
This dessert is perfect for summer gatherings, family dinners, potlucks, birthdays, holidays, and last-minute entertaining. Since it needs to chill before serving, you can also prepare it several hours ahead of time and keep it refrigerated until you’re ready to serve.
Why Everyone Loves No-Bake Oreo Vanilla Pudding Cake
- No oven required: This recipe is completely no-bake, making it perfect for warm days or when you want an easy dessert.
- Only a few ingredients: You don’t need a long grocery list to make this creamy Oreo dessert.
- Quick preparation: The active preparation takes only about 20 minutes.
- Creamy and crunchy: The soft vanilla pudding layer contrasts beautifully with the chocolate Oreo crust.
- Perfect for gatherings: A 9×13-inch dish makes plenty of servings for family and friends.
- Easy to make ahead: The cake actually benefits from chilling, making it convenient for parties and holidays.
- Family-friendly: The classic combination of Oreos and vanilla pudding is loved by both kids and adults.
Ingredients Overview
For the Oreo Crust
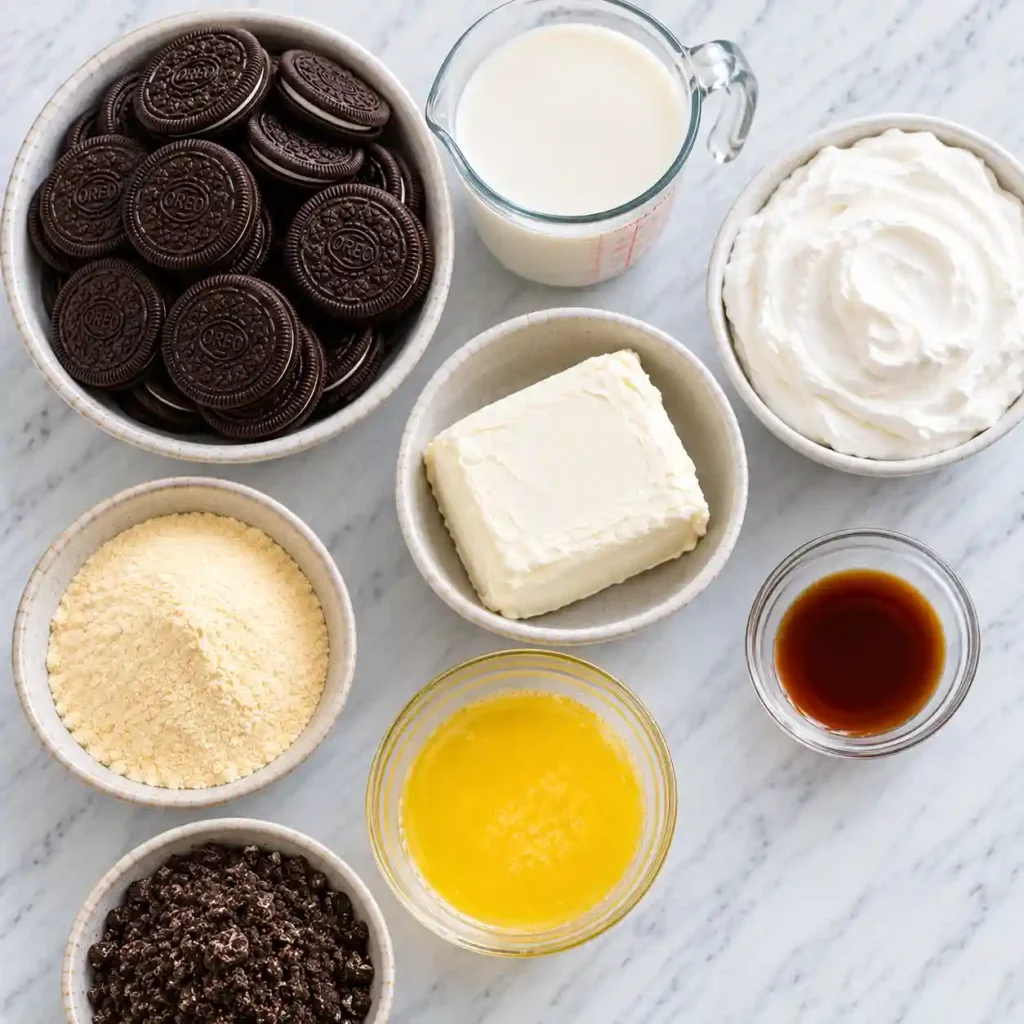
- Oreo cookies – The cookies create a rich chocolate crust with a delicious creamy filling already included.
- Unsalted butter – Melted butter binds the crushed Oreos together and gives the crust a firm, buttery texture.
For the Vanilla Pudding Cream Cheese Layer
- Instant vanilla pudding mix – Creates the sweet, creamy base of the filling and gives the dessert its classic vanilla flavor.
- Milk – Helps the pudding mix develop into a smooth and creamy consistency.
- Cream cheese – Adds richness and a slight tang that balances the sweetness of the pudding.
- Vanilla extract – Enhances the natural vanilla flavor and makes the filling taste even more homemade.
For the Topping
- Cool Whip – Adds a light, fluffy layer that balances the dense and creamy pudding filling.
- Oreo crumbs – Optional, but they add extra chocolate flavor and make the finished dessert look beautiful.
These simple ingredients come together to create a dessert that tastes much more elaborate than it actually is.
Variations
- Chocolate Oreo Pudding Cake – Replace the vanilla pudding with instant chocolate pudding for an extra-rich chocolate dessert.
- Golden Oreo Version – Use Golden Oreos instead of traditional chocolate Oreos for a lighter vanilla-flavored crust.
- Chocolate-Vanilla Combination – Use one box of vanilla pudding and one box of chocolate pudding to create a delicious layered flavor.
- Peanut Butter Oreo Cake – Add a thin layer of creamy peanut butter between the Oreo crust and vanilla pudding filling.
- Extra Oreo Version – Fold crushed Oreos into the pudding mixture before spreading it over the crust for even more cookie flavor.
How to Make No-Bake Oreo Vanilla Pudding Cake
1. Prepare the Oreo Crust
Begin by crushing the 36 Oreo cookies into fine crumbs.
The easiest way to do this is with a food processor. Place the whole cookies, including the cream filling, into the processor and pulse until you have fine, even crumbs.
Keeping the Oreo filling in the cookies is important because it contributes extra sweetness and helps create a rich crust.
Transfer the crumbs to a medium mixing bowl.
Pour in the melted unsalted butter and stir thoroughly until all of the crumbs are evenly moistened.
The mixture should resemble damp cookie crumbs and hold together when pressed.
2. Press the Crust Into the Pan
Prepare a 9×13-inch baking dish.
Transfer the Oreo mixture into the dish and press it firmly across the bottom.
Use the bottom of a measuring cup, glass, or flat spatula to create an even layer.
Press firmly enough that the crust holds together when the cake is eventually sliced.
Once the crust is evenly packed, place the dish in the freezer for a short time to help the crust firm up.
This step is especially helpful because it creates a sturdy foundation for the creamy pudding layer.
3. Prepare the Vanilla Pudding Mixture
While the Oreo crust is chilling, prepare the creamy filling.
Add the two packages of instant vanilla pudding mix and the milk to a large mixing bowl.
Whisk or beat the mixture until the pudding begins to thicken and becomes smooth.
Because you’re using instant pudding, there is no cooking required.
Add the softened cream cheese and vanilla extract.
Mix again until the cream cheese is completely incorporated and the mixture becomes smooth and creamy.
Make sure the cream cheese is softened before mixing. Cold cream cheese can leave small lumps throughout the pudding mixture.
4. Add the Vanilla Cream Cheese Layer
Remove the chilled Oreo crust from the freezer.
Carefully spoon the vanilla pudding cream cheese mixture over the crust.
Spread it evenly from edge to edge using a spatula.
Try not to press too aggressively while spreading because you don’t want to disturb the Oreo crust underneath.
Once the filling is smooth and even, you’re ready for the final layer.
5. Add the Cool Whip
Spread the Cool Whip evenly over the vanilla pudding layer.
A gentle touch will help keep the layers distinct and attractive.
Use a spatula to smooth the top, or create decorative swirls if you’re serving the dessert for a special occasion.
For an extra chocolate-cookie finish, sprinkle crushed Oreo crumbs over the top.
You can use a light dusting of crumbs or cover the entire surface depending on how much Oreo flavor you want.
6. Chill Before Serving
Cover the dish and place it in the refrigerator.
Allow the No-Bake Oreo Vanilla Pudding Cake to chill for at least 2–3 hours before serving.
This chilling time is important because it allows the pudding layer to firm up and the crust to become easier to slice.
For the best texture, you can also prepare the dessert the night before and let it chill overnight.
7. Slice and Serve
Once the dessert has chilled completely, slice it into squares.
Use a sharp knife and wipe the blade between cuts if you want cleaner-looking portions.
Serve the cake cold and enjoy the contrast between the chocolate Oreo crust, creamy vanilla pudding layer, and fluffy topping.
Pro Tips and Cooking Secrets
Use softened cream cheese. Allow the cream cheese to come to room temperature before mixing. This makes it much easier to create a smooth, lump-free pudding layer.
Press the Oreo crust firmly. A firmly packed crust will hold together better when you cut and serve the cake.
Don’t rush the chilling time. The dessert needs at least 2–3 hours in the refrigerator so the filling and crust can firm up properly.
Make it ahead for the best results. Preparing the dessert the night before allows the layers to fully set and gives you an easy dessert that’s ready to serve when guests arrive.
Serving Suggestions
- Serve each square chilled with a few extra crushed Oreos sprinkled over the top.
- Add fresh strawberries or raspberries for a bright fruity contrast to the creamy vanilla filling.
- Drizzle individual servings with chocolate syrup for an extra indulgent dessert.
- Serve alongside coffee, hot chocolate, or a cold glass of milk for a simple and delicious treat.
How to Store No-Bake Oreo Vanilla Pudding Cake
Because this dessert contains milk, cream cheese, and whipped topping, it should always be stored in the refrigerator.
Cover the 9×13-inch dish tightly with plastic wrap or aluminum foil, or transfer individual portions into airtight containers.
Keep the dessert refrigerated until you’re ready to serve it.
For the best texture and flavor, enjoy it within 3–4 days.
Can You Make Oreo Pudding Cake Ahead of Time?
Yes! This is one of the best things about this recipe.
You can prepare the entire dessert several hours before serving or make it the night before. In fact, allowing it to chill overnight can make the layers even firmer and easier to slice.
This makes it a fantastic option for holidays, birthdays, potlucks, and family gatherings when you don’t want to prepare dessert at the last minute.
Can You Freeze No-Bake Oreo Vanilla Pudding Cake?
You can freeze the dessert, although the texture may change slightly after thawing because of the dairy-based filling and whipped topping.
If you decide to freeze it, cover it extremely well to prevent freezer odors and ice crystals from forming.
Thaw it slowly in the refrigerator before serving rather than leaving it at room temperature.
For the freshest texture, refrigeration is generally the preferred storage method.
No-Bake Oreo Vanilla Pudding Cake FAQs
Does Oreo pudding cake need to be refrigerated?
Yes. Since the dessert contains milk, cream cheese, pudding, and whipped topping, it should be kept refrigerated until serving and while storing leftovers.
Can I use a different Oreo flavor?
Absolutely. You can experiment with different Oreo varieties to create new flavors. Golden Oreos are especially delicious with vanilla pudding, while chocolate-flavored Oreos create an even richer dessert.
Can I use homemade whipped cream instead of Cool Whip?
Yes. Homemade whipped cream can be used instead of Cool Whip. Make sure the whipped cream is whipped to firm peaks so it holds its shape on top of the dessert.
Why is my Oreo crust falling apart?
The most common reason is that the cookie crumbs weren’t mixed thoroughly enough with the melted butter or the crust wasn’t pressed firmly into the pan. Make sure the crumbs are evenly moistened and firmly packed.
Can I use chocolate pudding instead of vanilla?
Yes. Chocolate pudding is an easy substitution and creates a delicious chocolate Oreo pudding cake.
How long should Oreo pudding cake chill?
Chill the dessert for at least 2–3 hours before serving. For the best results, let it chill overnight.
Can I make this dessert in a smaller pan?
Yes, but the thickness of the layers will change. A 9×13-inch dish gives you a nice balance between the crust, pudding filling, and whipped topping.
Can I add extra Oreos?
Definitely. Crushed Oreos can be sprinkled over the top or folded into the pudding mixture for extra cookie flavor and texture.
No Bake Oreo Vanilla Pudding Cake Recipe

Equipment
- food processor
- medium bowl
- large bowl
- 9×13-inch dish
Ingredients
- 36 Oreo cookies
- 1/2 cup unsalted butter, melted
- 2 boxes instant vanilla pudding, 3.4 oz packages
- 3 cups milk
- 8 oz cream cheese, softened
- 1 tsp vanilla extract
- 3 cups Cool Whip
- Oreo crumbs, optional
Instructions
- In a food processor ground whole Oreo cookies with the filling to make fine crumbs.
- In a medium bowl, stir together melted butter with Oreo crumbs until evenly moistened, then press the mixture in the bottom of 9×13-inch dish, set in the freezer to firm.
- In a large bowl, mix together vanilla pudding mix and milk until well blended.
- Add cream cheese and vanilla extract and mix until smooth and creamy.
- Spread the pudding mixture over chilled crust.
- Top with Cool Whip and sprinkle with Oreo crumbs.
- Refrigerate at least 2-3 hours before serving.